Create Named Credential
info
Plinqx uses this Named Credential to securely authenticate and manage API calls between Salesforce and Plinqx. By leveraging the Plinqx Auth Provider, this Named Credential ensures a seamless and secure connection using OAuth 2.0 authentication.
This setup allows Plinqx to interact with Salesforce APIs using a Named Principal, ensuring that API requests are authenticated correctly while following Salesforce security best practices.
Step 1: Navigate to Named Credentials
- Go to Setup in Salesforce.
- In the Quick Find box, search for and select Named Credentials.
- Select the dropdown next to New Named Credential and select New Legacy

Step 2: Configure the Named Credential
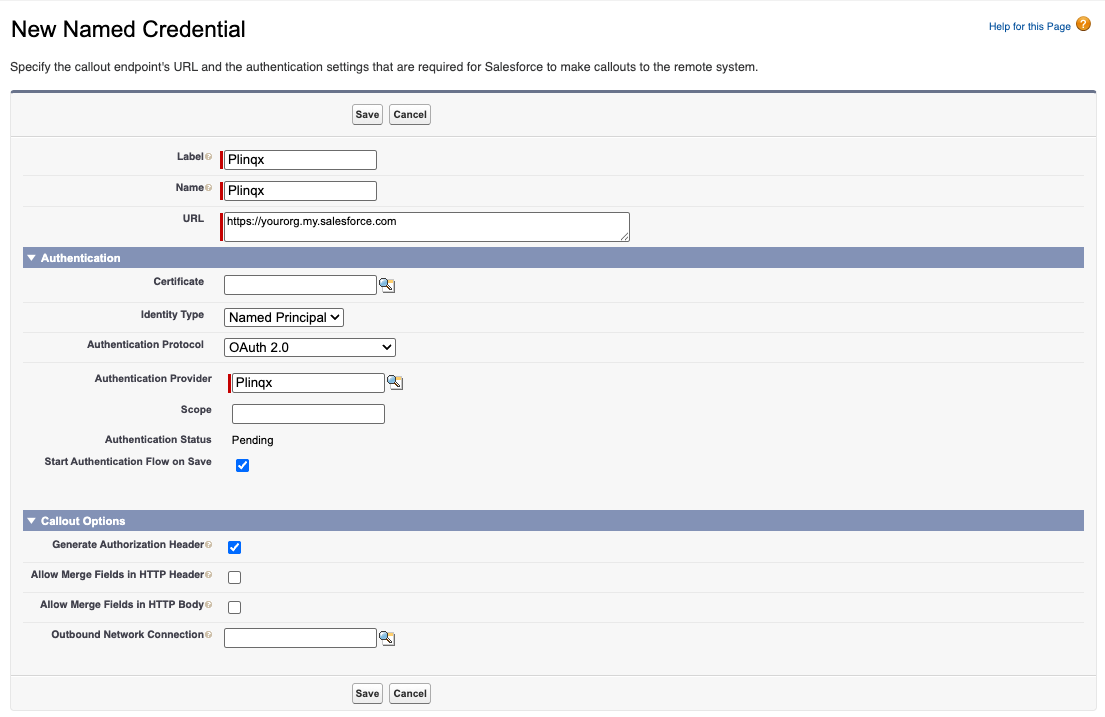
- Enter the following details:
- Label:
Plinqx - Name:
Plinqx - URL: Set this to the base URL of your Salesforce org (e.g.,
https://yourorg.my.salesforce.com). - Identity Type: Select Named Principal.
- Authentication Protocol: Select OAuth 2.0.
- Label:
Step 3: Select the Plinqx Auth Provider
- Next to the Authentication Provider field, select the lookup icon and select the Plinqx Auth Provider (previously created).
- Check Generate Authorization Header to ensure the correct headers are included in API requests.
Step 4: Save the Named Credential
- Click Save to apply the configuration.
- Salesforce will validate the Named Credential setup.
- On the Authentication Page login using your admin/system account that you will be using.
- Once Authenticated click Confirm.